
 Get self-health education, nutrition resources, and a FREE copy of A Terrible Ten: Health Foods That Ain't ebook.
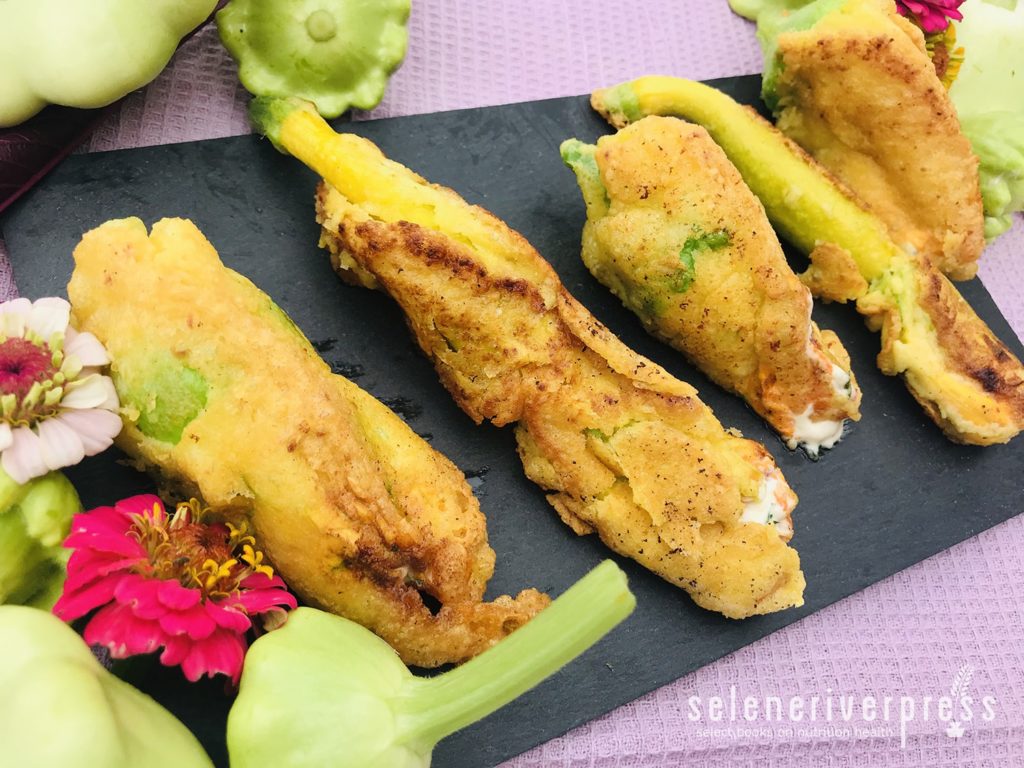
I can’t let the summer go by without sharing at least one post celebrating the season’s most prolific crop: the equally loved and loathed zucchini. Mid-August may be a little later in the season than I usually publish my annual zucchini post, but now that everyone is surely becoming sick of all that darned summer squash, it may be the perfect time.
The great thing this time around is that I’m not calling on you to eat any more of it. By using the immature squash with the blossoms still attached, this recipe is more about appreciating the plant in a whole new way. And it may just help you reduce the quantity of mature fruit you’ll need to deal with down the road!
Since each squash blossom is the embryo of the fruit, any blossoms you harvest will help moderate the chances of excess fruit in the future. The blossoms alone are edible and beautiful, but I prefer waiting until the fruit has just started to form, but with the blossom still connected, as they’re simply so fun. However, the blossoms will begin to decompose and detach from the squash as soon as the fruit starts forming. It’s a short window, so don’t fret if you miss this opportunity. Of course, you could harvest as many of the blossoms with baby fruits forming as possible and then round out your harvest with solo blossoms should you not have enough of the former. This would also provide visual intrigue when you serve them.
I’ve seen squash blossoms stuffed with all manner of sweet and savory fillings, including ground meat and silken, melty cheese. They have a fairly neutral flavor, and I can’t think of anything that wouldn’t work with them. Here I’ve filled the blossoms with ingredients straight from an antipasto spread—a delectable blend of creamy cheese, pickles, olives, and herbs.
But what elevates these babies to uber-indulgence is the light and airy crust, fried to a faultless, golden crisp. I was over the moon with the results of my victorious grain-free trial version. Furthermore, I found that you can successfully reheat the blossoms to an impressive crispiness, meaning you can easily make them in advance and pop them in the oven just before serving. These are ideal for a dinner party or any other occasion when you don’t want to hover over the stove.
Antipasto-Stuffed Squash Blossoms
Makes 12 stuffed blossoms
Prep time: 20 minutes
Cook time: 20 minutes
Ingredients
For the filling:
6 oz. cream cheese
2 oz. grated Parmesan or Romano cheese
1 small clove garlic, minced
1 small handful parsley, chopped
6–8 olives, any type, finely chopped
2 tablespoons finely chopped roasted pepper
2 tablespoons finely chopped marinated artichokes
12 fresh squash blossoms, with fruit attached or not
For the crust:
⅔ cup almond flour
1 tablespoon coconut flour
¼ cup grass-fed collagen
2 teaspoons baking powder (grain free, if important)
2 large eggs
⅓ cup sparkling water
¼ teaspoon salt
¼ teaspoon pepper
Lard, tallow, or another suitable, high-heat fat
Instructions
- Whip cream cheese until softened. Stir in remaining filling ingredients.
- Carefully open each blossom and stuff with about 1½–2 tablespoons of cheese filling. Twist blossom end shut to seal. Repeat until all blossoms have been filled.
- Combine crust ingredients in a small bowl and let sit for 10 minutes. Meanwhile, heat about 1 inch of lard, tallow, or other cooking fat in a shallow pan over medium heat, until hot.
- Dip stuffed squash blossoms, one at a time, into rested batter and shake off any excess. Transfer to hot oil, placing just enough blossoms into pan as will fit comfortably without crowding, about 4 at a time. Fry until golden-brown on one side. Using tongs, carefully flip to cook the other sides until all are golden-brown. Transfer to a paper towel-lined plate. Wipe out pan of any burnt batter, add a little more fat, and repeat with remaining blossoms. Serve hot.
- If you make these in advance, store in a single layer, covered, in the fridge. Place on a parchment paper-lined baking sheet and bake in preheated 400°F oven until hot and crisp, about 5–7 minutes.

Image from Briana Goodall.