
 Get self-health education, nutrition resources, and a FREE copy of A Terrible Ten: Health Foods That Ain't ebook.
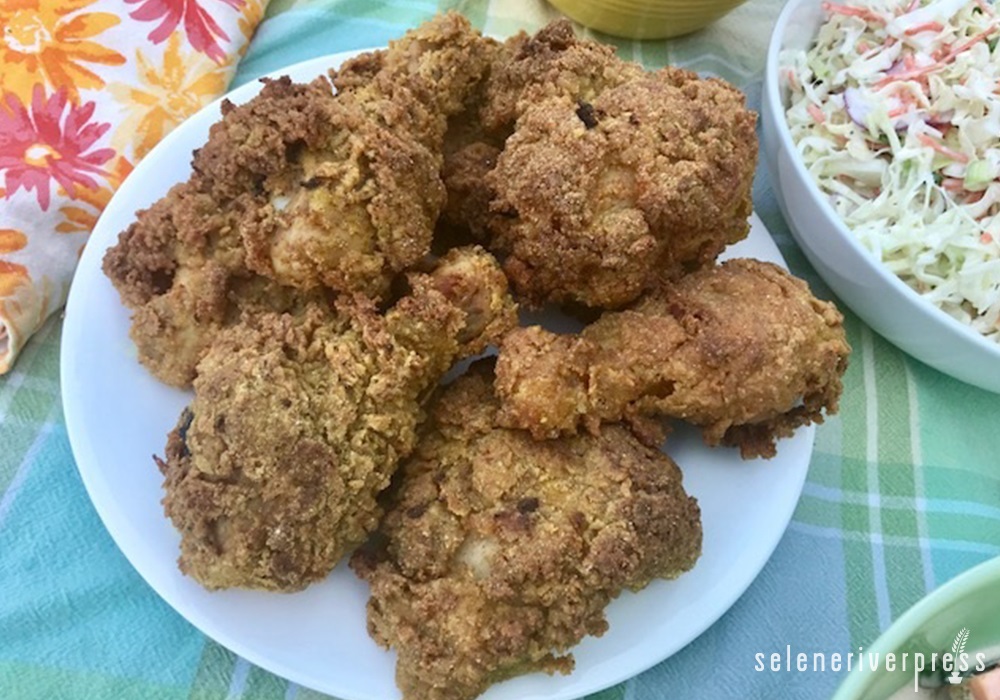
Few foods are as American, or picnic worthy, as fried chicken. Yet most people never even consider making it at home. I get it. Deep-frying is daunting. It can be messy, smoky, and dangerous if not done properly. Plus picking up ready-made fried chicken at a store or restaurant is just so darn convenient. Outsourcing definitely makes sense when it comes to fried chicken, especially for less-experienced cooks.
That said, it’s always nice to know exactly what goes into your food, especially if you’re trying to avoid processed and artificial ingredients. With such ingredients pretty much guaranteed in fried chicken from elsewhere, it’s good to have a homemade option. And I figure what better time to lead you into the world of home-fried chicken than the last long weekend of summer.
- Let’s start with some tips regarding equipment and oil for deep-frying at home. Even if you’re not sure that you’ll ever make fried chicken yourself, these pointers will help ensure success and safety with whatever you do deep-fry. Use the correct type of pot, one with high sides and a heavy gauge. It never ceases to amaze me just how much the oil level rises after the food is dropped in it. That food also lowers the temperature of the oil upon contact, and a heavy gauge retains the heat of the oil most effectively. I use a big soup pot, but a Dutch oven, stockpot, or high-sided saucepan will also work well.
- A candy thermometer, though not absolutely necessary, is my favorite way to ensure the proper temperature of the oil. Clip it onto the side of the pot, with the end immersed in the oil, and you can easily adjust the temperature of the stove top to maintain the right oil temperature throughout the frying process.
- Other crucial items include a good set of metal tongs, a slotted spoon, and a spider (which looks like a big mesh ladle). Also, make sure you have quality pot holders or oven mitts. If you have an electric stove top, you may need to move the pot off the heat if the oil gets too hot, and a good set of holders or mitts will help you do this safely.
- A neutral oil that can withstand high heat is integral for quality frying. Peanut oil and lard are my top two recommendations. (Well, actually, duck fat is my very top recommendation. I happened to have a few containers of it in my freezer when I wrote this, but I realize it’s not exactly accessible for most people.)
Now let’s get to the fried chicken!
There are two types of fried chicken lovers in this world: those who prefer their chicken hot and those who prefer it cold. I’m the former type. While I can appreciate a good piece of cold fried chicken, the problem is, once it’s been refrigerated, the breading too often becomes soggy. The trick to get the crust to stay crunchy after refrigeration, I’ve discovered, is to double dip it before frying (as detailed in the recipe). This ensures not only a delectable shell for those who like their chicken hot but also an extra-crispy crust that holds up to being chilled.
Another key to fried chicken, or any fried item for that matter, is to maintain the right oil temperature. Too hot, and your food will darken long before it cooks through. Too cold, and the oil will seep into the food, creating a greasy texture and flavor. The oil should be hot enough that it instantly starts sizzling the outer edges of your food, creating a crust that seals in the moisture of the interior, but not so hot that the crust starts darkening immediately. Because maintaining the right temperature is so important, it’s often best to work in small batches when deep-frying, since overloading the pot can reduce the oil temperature too much before it comes back up.
When deep-frying small items, such as nuggets of meat or vegetables, acquiring that rich golden color and cooking your item thoroughly is rarely a problem if you maintain the right oil temperature. However, frying bone-in chicken pieces at home is a bit trickier, and I’ve come to realize it’s easier to fry the chicken until the crust is golden and then transfer the pieces to the oven and bake them until the meat is cooked through. For this you will need a baking rack set in a sheet pan, which allows the oven’s heat to penetrate the bottom of the meat as well as the top.
Finally, an overnight soak in seasoned buttermilk really gives the chicken incredible flavor and texture. Use any type of flour you prefer for the crust. I used einkorn combined with a little white whole wheat. For extra crunchy chicken, try using some rice flour in your mix. And, as I mentioned above, a double-dip of the breading creates the crunchiest crust, so don’t skip that step!
Serve Buttermilk Fried Chicken with assorted pickles and condiments of your choosing along with all your favorite side dishes for a delicious, truly memorable picnic.
Buttermilk Fried Chicken
Note: You’ll need enough fat or oil to come 6 inches up the side of your pot. For the chicken pieces, I like to use drumsticks and thighs. If you’re not sure how many pieces of chicken you should fry at one time, remember that it’s better to fry fewer pieces, in multiple batches, than too many pieces at once, which can cause the pieces to stick together and become saturated with oil. As a guide, most soup pots can cook 4 to 6 pieces at a time.
Makes: 8 pieces
Prep time: 20 minutes, plus time to marinate
Cook time: 1¼ hours, more if you’re making a big batch
Equipment:
Sheet pan
Baking rack
A pot or pan for frying (see tips above)
Candy thermometer (optional but recommended)
Pot holders or oven mitts
Long-handled tongs
Large slotted spoon
Spider
Instant-read thermometer
Ingredients
For the buttermilk marinade:
2 cups buttermilk
4 teaspoons salt
¼ teaspoon cayenne pepper
½ teaspoon black pepper
1 teaspoon hot paprika
½ teaspoon granulated garlic
½ teaspoon granulated onion
8 pieces bone-in chicken
Oil or fat for frying, such as peanut oil or lard
For the crust:
1½ cups einkorn or other whole-grain flour
½ teaspoon turmeric
1½ tablespoons salt
1½ tablespoons black pepper
2 teaspoons hot paprika
¾ teaspoon granulated onion
¾ teaspoon granulated garlic
Instructions
- Combine buttermilk marinade ingredients (buttermilk through granulated onion) in a large bowl or other container large enough to fit all the chicken pieces. Add chicken and toss to coat evenly. Cover and refrigerate overnight.
- Preheat the oven to 350˚F. Line a baking sheet with a cooling rack and set aside. (You may need two sheets if your chicken pieces are very large. There should enough room so that there is ample space between the pieces.) Remove chicken from fridge and set aside.
- Put enough oil or fat into your frying pot to come up the sides about 6 inches. Clip candy thermometer, if using, on the side of your pot, with the tip inserted into the oil. Heat oil on stove top over medium-high heat until the thermometer reads between 325˚F and 350˚F. (To test the oil without a thermometer, place a pinch of flour into the pot; if it immediately sizzles and starts to brown, the oil is ready.) Keep oil at roughly this temperature by adjusting the heat of your burner. If the oil gets above 375˚F, remove the pot briefly from the burner (using pot holders or oven mitts) to allow it to cool slightly.
- Combine the crust ingredients in a large bowl. Remove one piece of chicken from the marinade and let any excess marinade drip off, making sure that most of it still adheres to the chicken. Add chicken to flour mixture and toss until evenly coated; remove and set aside. Repeat with a few more pieces of chicken. Now take the floured chicken pieces and briefly dip them in the buttermilk marinade once again to coat. Toss the pieces once again in the flour mixture. (A coating with big chunks of flour and buttermilk adhered to the outside will give you lots of yummy, crunchy crevices.)
- Carefully place the prepared chicken pieces in the hot oil, about 4 to 6 pieces at a time depending on the size of your pot. Be careful—the oil will rise and possibly splatter. Once the pieces have fried for a couple minutes, carefully turn them using your tongs and agitate them a bit to allow any unexposed spots to fry properly. When the pieces are golden-brown, remove them with tongs or a slotted spoon and place them on the rack on the baking sheet. Be sure to leave ample space between the pieces so they don’t steam and get soggy.
- Using a spider or slotted spoon, scoop out any chunks of batter from the oil and discard. Adjust the temperature, if necessary, to bring the temperature back to 325˚F–350˚F. Repeat the flouring and frying steps with the remainder of the chicken.
- Place the baking sheet(s) in the oven and bake until the chicken is thoroughly cooked, about 35–45 minutes depending on the size of your pieces. (If they are very large, it could take closer to an hour.) Test the pieces with an instant-read thermometer, inserting the probe into the thickest part of the meat and being careful not to contact bone. It should read 160˚F. (Alternately, test chicken by pricking it and observing the released juices. Their color should be totally clear, not pink or bloody.) Serve chicken hot or cold with all your favorite fixings.

Image by Briana Goodall.
Related Topics
healthy recipes | summer recipes